 HL Architect
Setup Guide
Everything you need to go from purchase to your first HighLevel API call with Claude Code.
Set Up Your API Server
HighLevel's OAuth flow requires a real server endpoint for the callback URL. You can't use localhost in production. The fastest way to get a production server running is Next.js on Vercel — free tier, zero config, automatic deploys.
1 Create a Next.js project
npx create-next-app@latest my-hl-integration --typescript --tailwind --app
cd my-hl-integration
2 Push to GitHub and deploy to Vercel
Create a repo on GitHub, push your code, then go to vercel.com and import the repo. Vercel detects Next.js automatically and deploys in about 60 seconds.
3 Add your custom API subdomain
In your Vercel project, go to Settings > Domains and add api.yourdomain.com. Vercel will give you a DNS record to add:
| Type | Name | Value |
|---|---|---|
| CNAME | api | cname.vercel-dns.com |
Add that CNAME record at your domain registrar (GoDaddy, Namecheap, Cloudflare, etc.) and wait a few minutes for DNS propagation.
yourdomain.com. Your API server lives at api.yourdomain.com. This keeps them separate — your website can be hosted anywhere while your API server handles all the HighLevel integration logic on Vercel.Activate Your License
After purchase, you'll receive a confirmation email and a GitHub repository invite for your tier(s).
1 Check your email
Look for a GitHub repo invite from randall-gross. If you provided your GitHub username at checkout, the invite is sent automatically. Check spam if you don't see it within a few minutes.
2 Accept the GitHub invite and clone
After purchase, you'll receive a GitHub repo invite. Accept the invite and clone all repos you have access to:
# Clone the base skill (required)
git clone https://github.com/randall-gross/highlevel-claude-skills.git

# Clone your paid repo(s) — you'll have access after purchase
git clone https://github.com/randall-gross/highlevel-claude-skills-pro.git
git clone https://github.com/randall-gross/highlevel-claude-skills-enterprise.git
3 Merge references into the skill folder
Copy the additional domain references into the base skill folder. They plug right in — no configuration needed.
# Copy references from each repo you purchased
cp -r highlevel-claude-skills-pro/references/* \
  highlevel-claude-skills/skills/highlevel/references/

cp -r highlevel-claude-skills-enterprise/references/* \
  highlevel-claude-skills/skills/highlevel/references/
4 Install the skill
Copy the skill folder into your Claude Code skills directory:
# macOS / Linux
cp -r highlevel-claude-skills/skills/highlevel ~/.claude/skills/

# Windows
xcopy highlevel-claude-skills\skills\highlevel %USERPROFILE%\.claude\skills\highlevel /E /I
5 Verify it works
Open Claude Code in any project and ask a HighLevel API question. Claude should automatically use the skill:
> "How do I create a contact in HighLevel?"If Claude responds with the exact endpoint, method, parameters, and working code — you're all set.
Connect to HighLevel
The skill gives Claude the knowledge of every HL API endpoint. But to actually call the API, you need credentials. There are two approaches:
Private Integration Token
Single sub-account, 5 min setup. Best for getting started quickly.
Option A: Private Integration Token
5 minutes. No server required.
1 Open HighLevel Settings
Log in to your sub-account > Settings (gear icon) > Integrations > Private Integrations tab.
2 Create a Private Integration
Click "+ Create Private Integration". Name it something descriptive like
Claude Code API.3 Select your scopes
Choose the permissions your integration needs. Common scopes:
contacts.readonly / contacts.writecalendars.readonly / calendars/events.writeopportunities.readonly / opportunities.writeconversations.readonly / conversations.write4 Copy your token
The token is shown once. Copy it immediately. If you lose it, create a new integration.5 Store your credentials
.env.localGHL_PRIVATE_TOKEN=eyJhbGciOiJSUzI1NiIs... GHL_LOCATION_ID=ve9EPM428h8vShlRW1KTYour
GHL_LOCATION_IDis in the URL bar when inside a sub-account:https://app.gohighlevel.com/v2/location/ve9EPM428h8vShlRW1KT/...
Option B: OAuth 2.0 Marketplace App
For multi-account access. Requires a server (see Part 0).
1 Go to the HL Marketplace
Go to marketplace.gohighlevel.com and sign in with your agency account. Click "+ Create App".
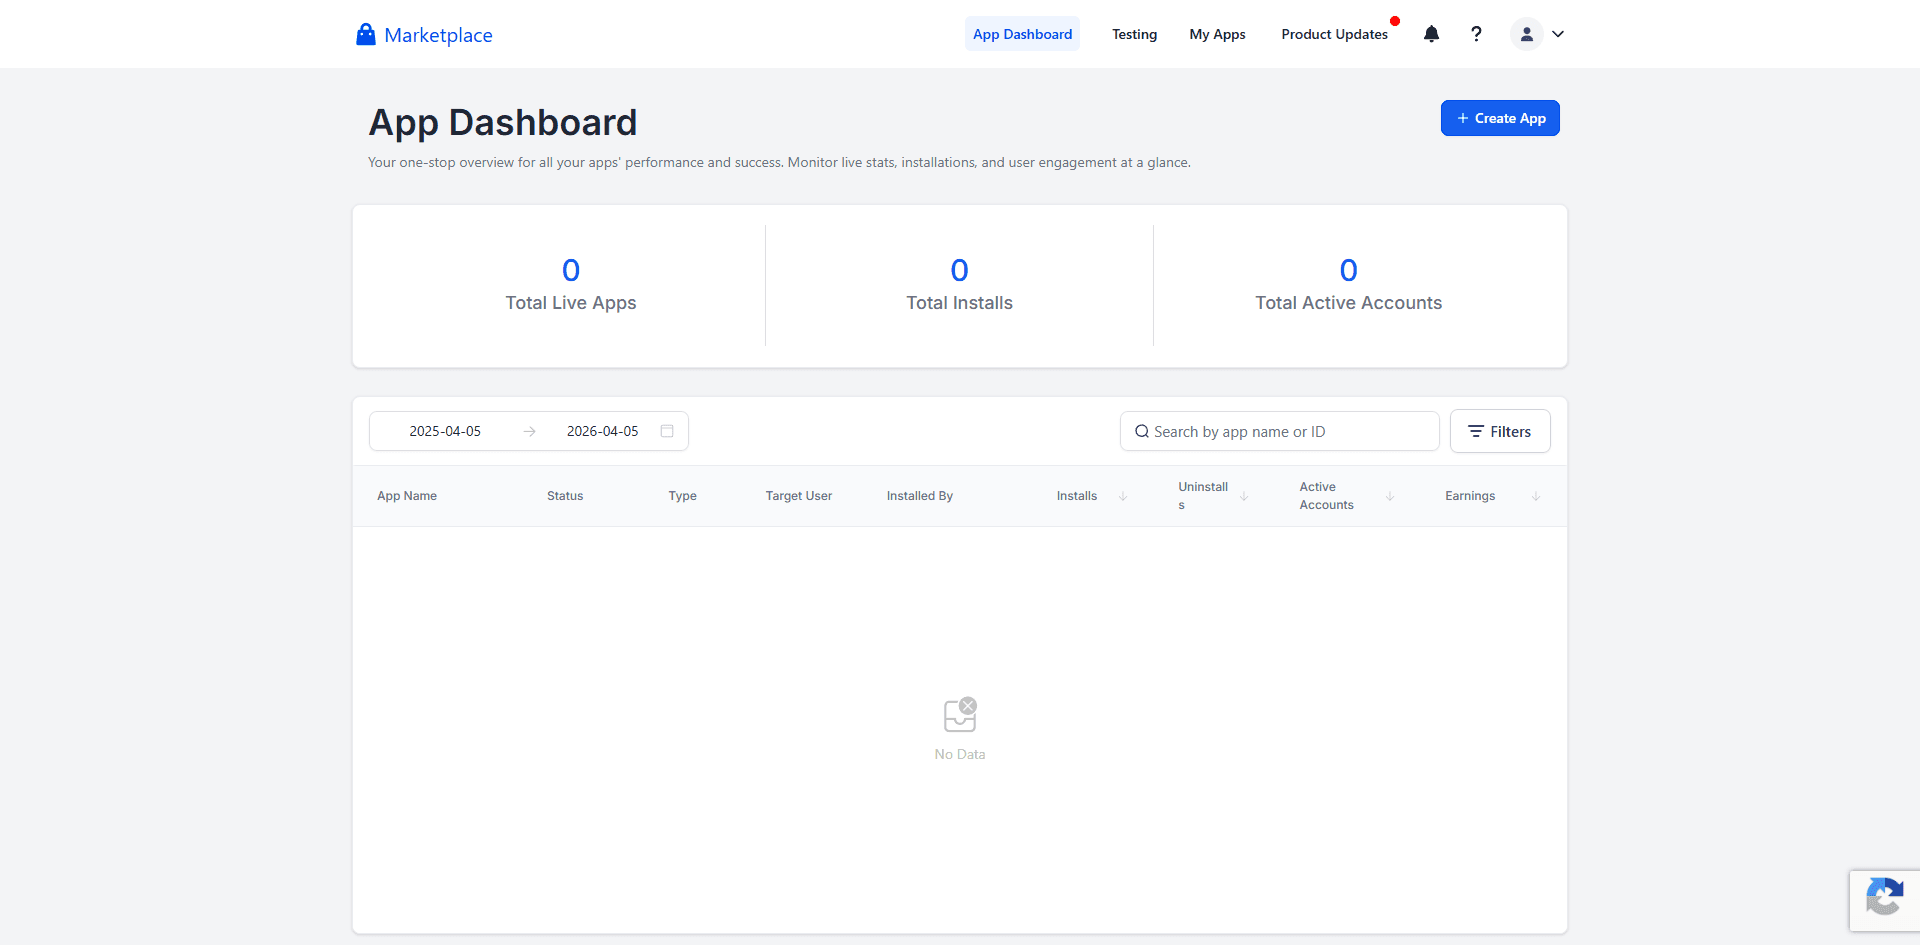
The App Dashboard with the '+ Create App' button in the top right 2 Create a Private App
Fill in your app name and select "Private" under App Type. This is the key step — Private apps work immediately with no marketplace review required.
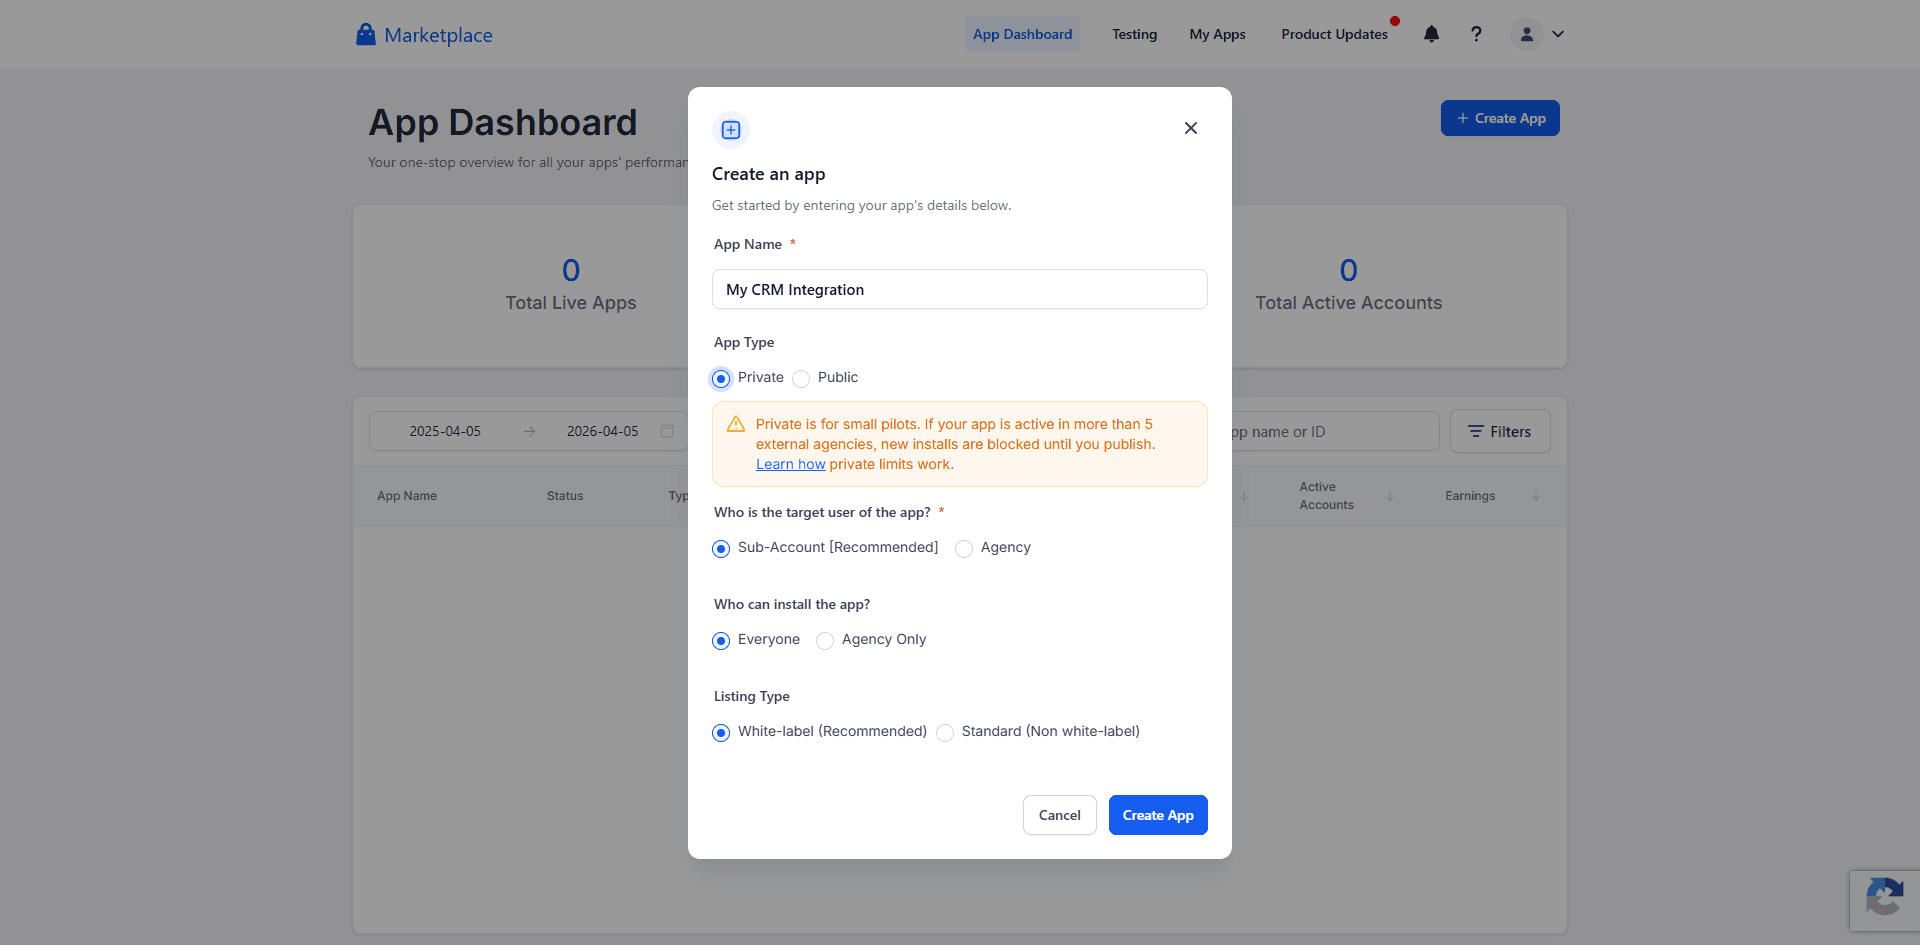
Select 'Private' — no approval process needed for internal use Private apps are limited to 5 external agencies. Since this is for your own agency, that limit doesn't matter.3 Configure the Redirect URL
Go to Advanced Settings > Auth. Enter your callback URL using the API subdomain you set up in Part 0:
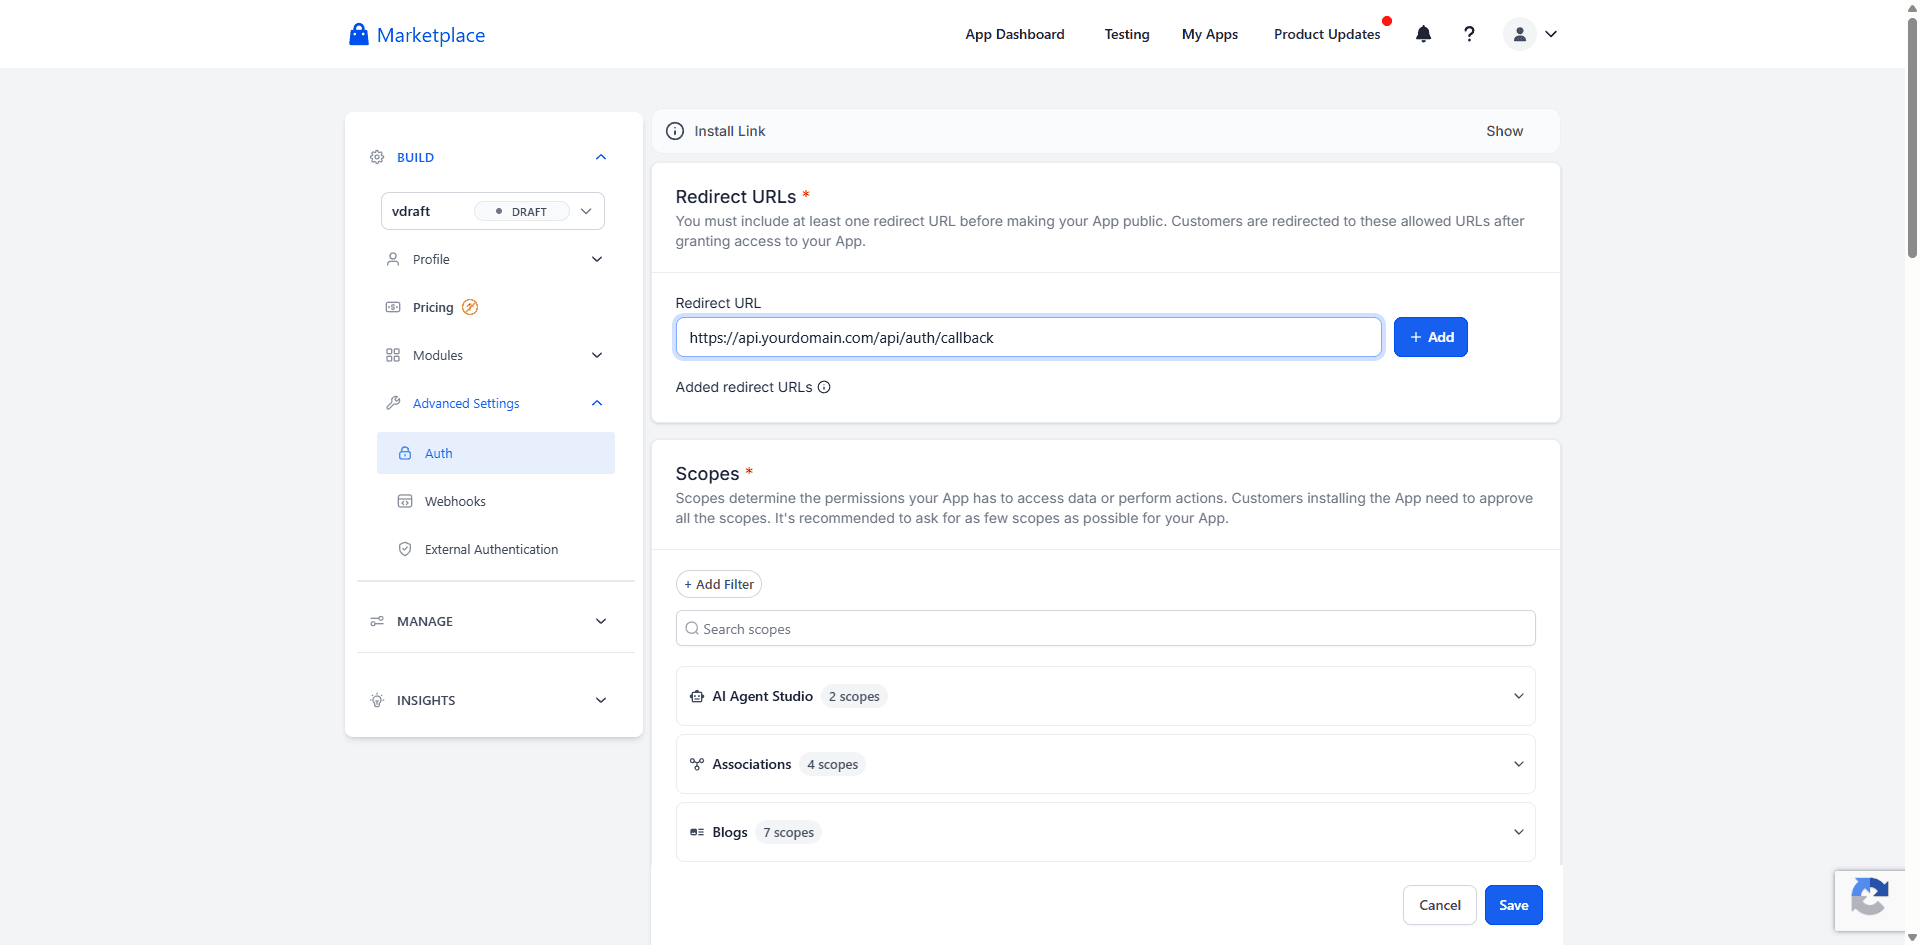
Enter your redirect URL and click '+ Add' to save it 4 Select your scopes
Scroll down to the Scopes section. Expand each category and check the scopes your integration needs. Each scope shows a description and whether it applies to Sub-Account or Agency level.
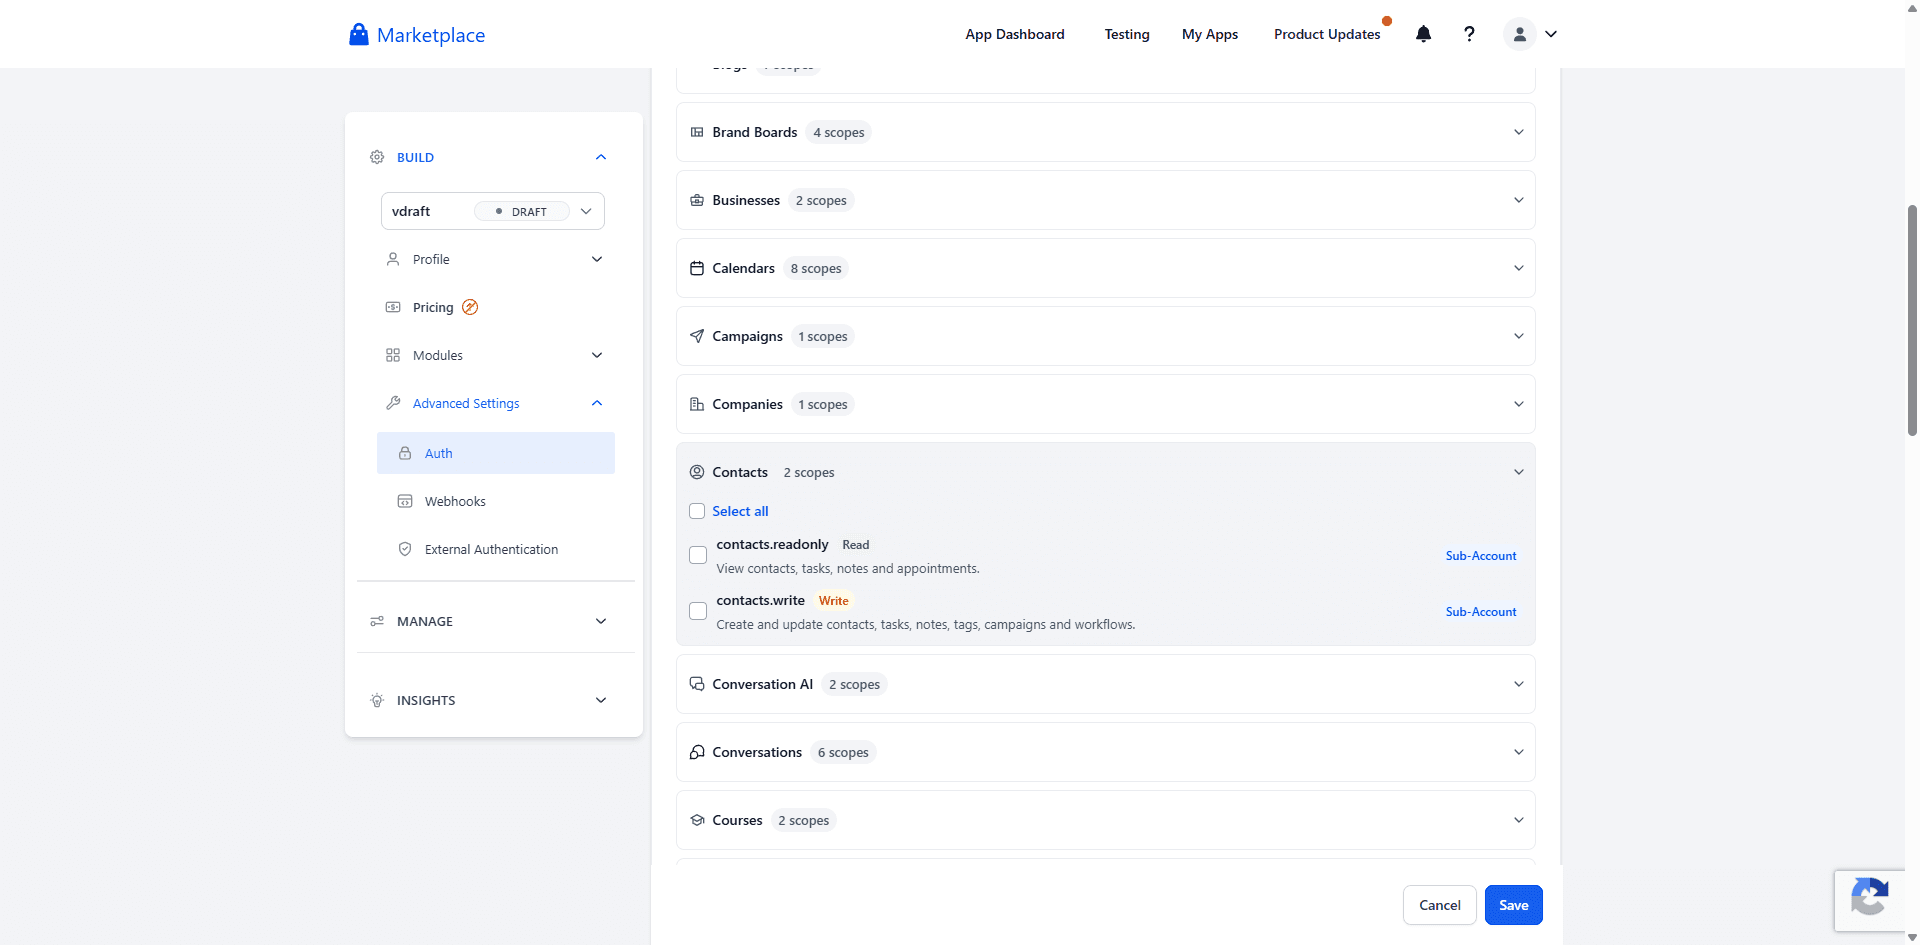
Expand each category and check the scopes you need Select ALL scopes you might ever need. Scopes are locked at install time. If you add scopes later, users must uninstall and reinstall the app.5 Generate your Client Keys
Go to MANAGE > Secrets. Click "+ Add" under Client Keys, name it
Default, and click Add.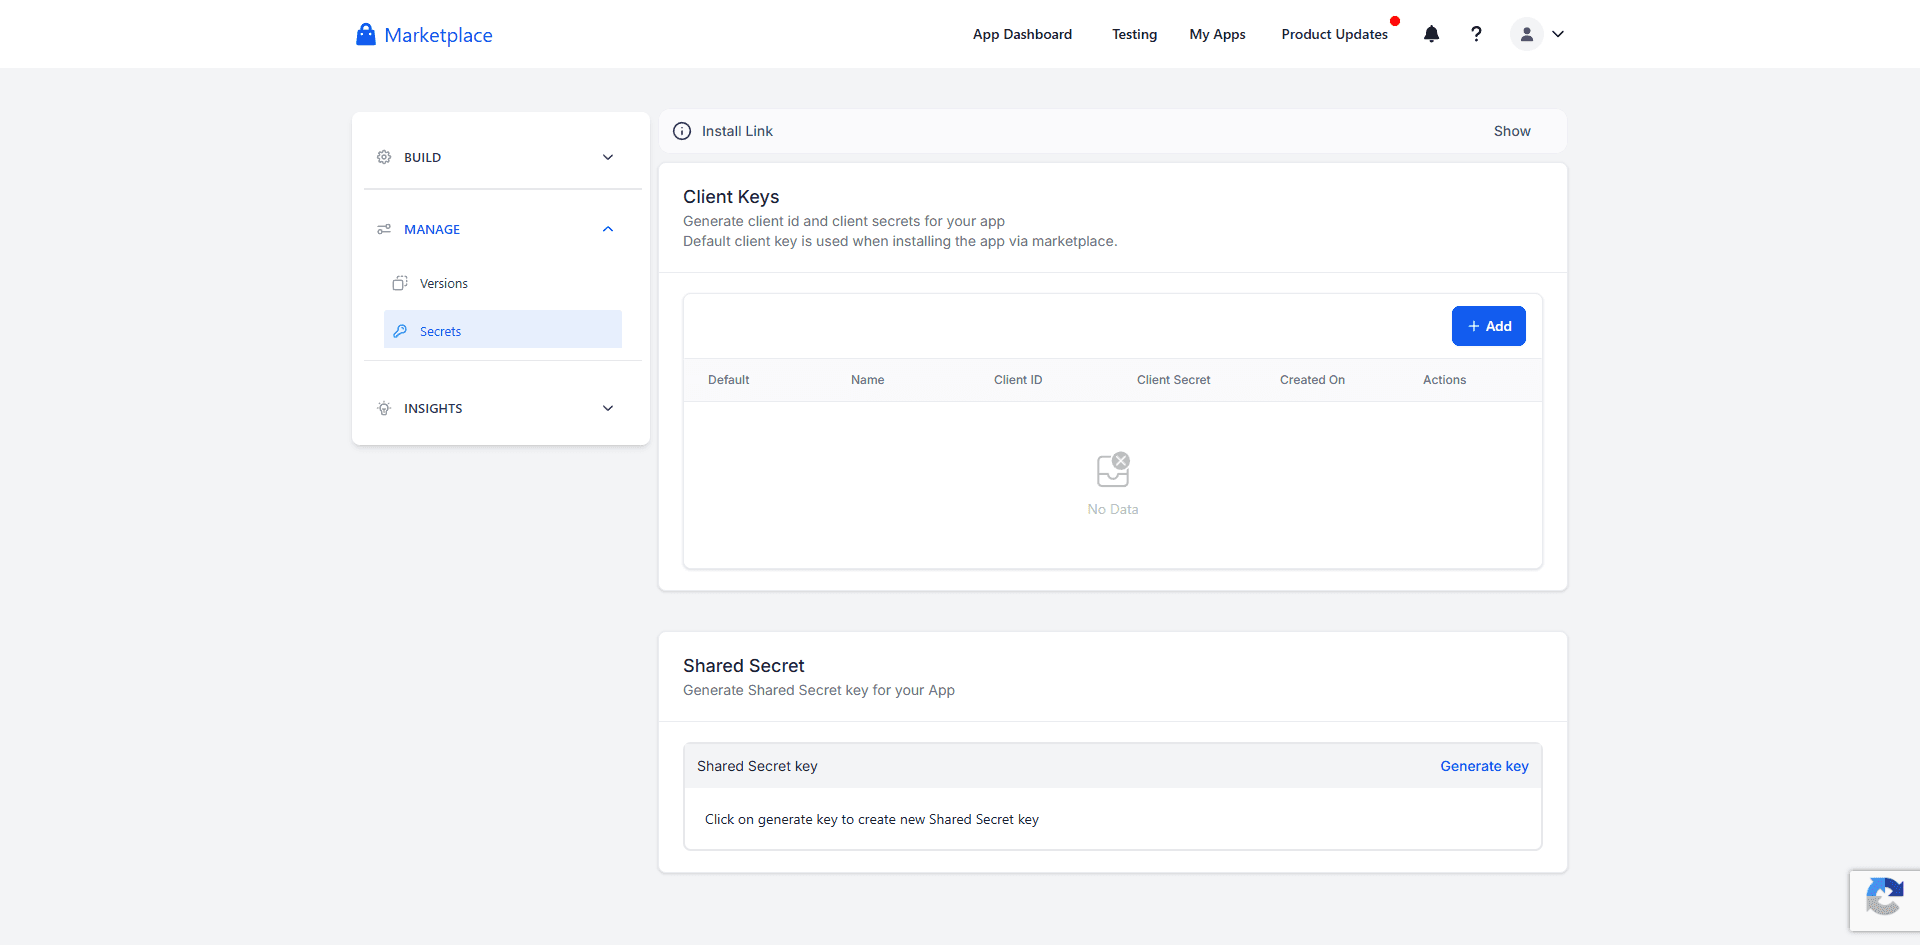
Click '+ Add' to generate your Client ID and Client Secret A modal will display your Client ID and Client Secret. Copy both immediately.
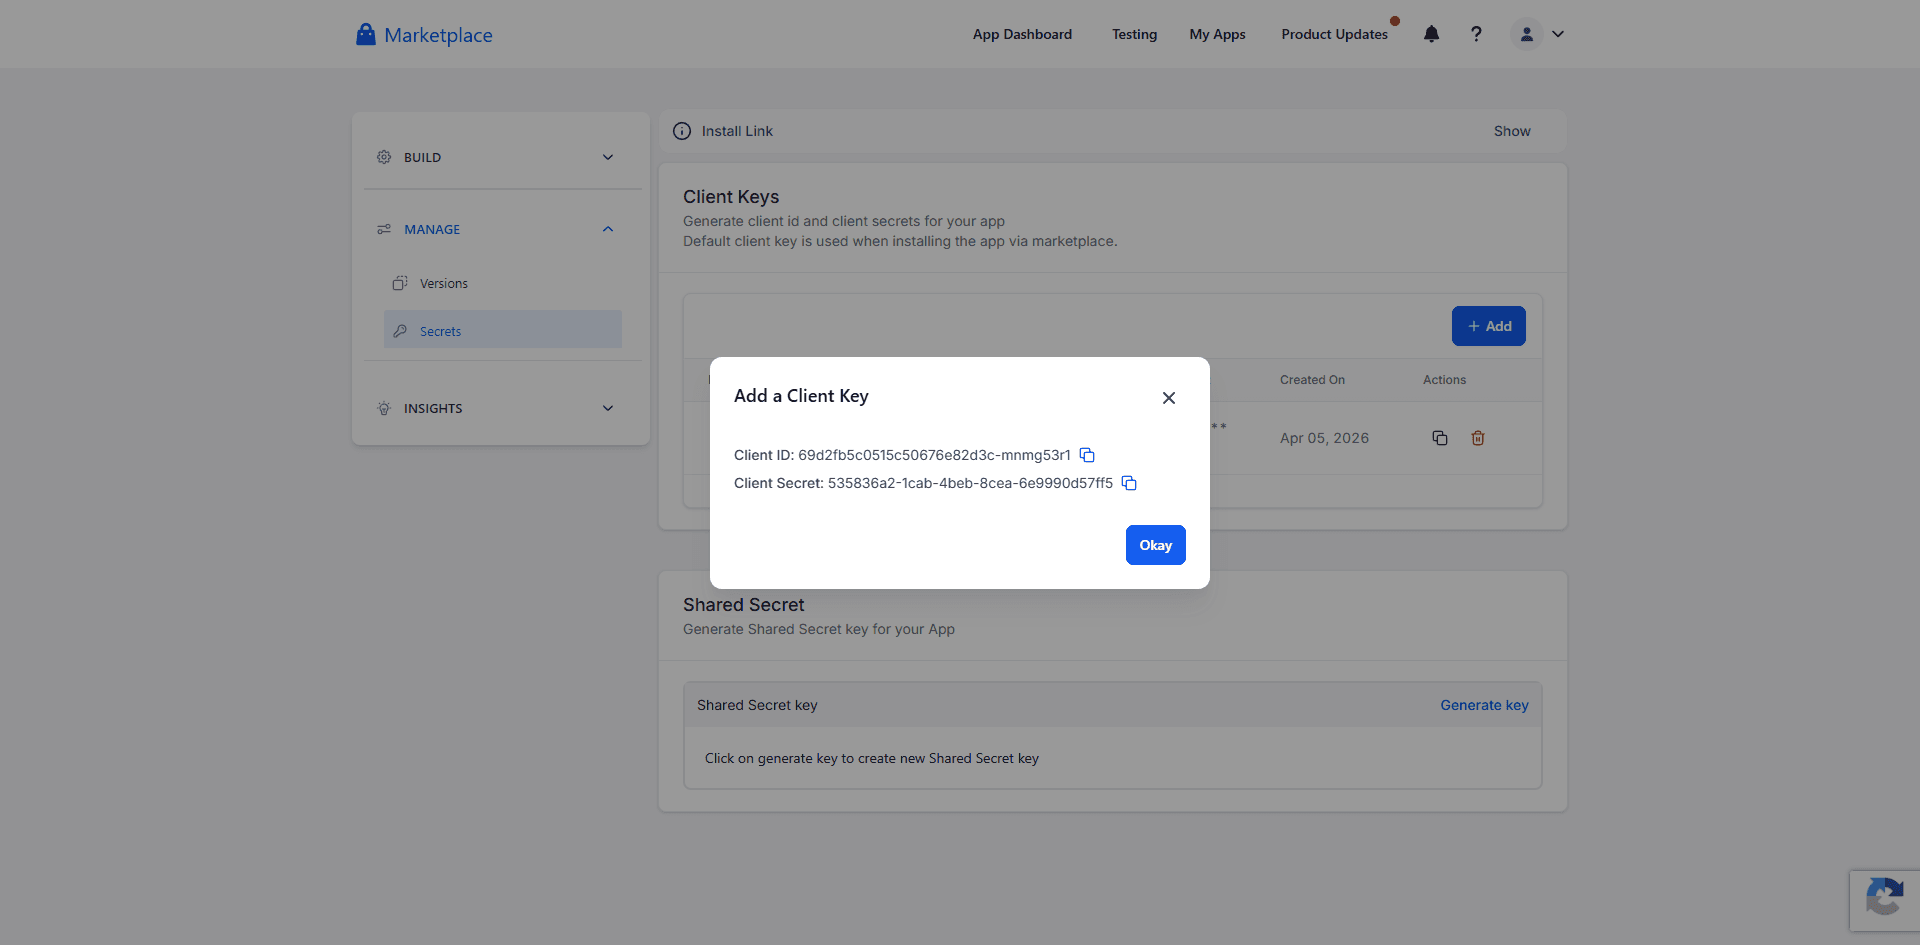
Copy both values — the Client Secret is only shown once .env.localGHL_CLIENT_ID=your-client-id-here GHL_CLIENT_SECRET=your-client-secret-here GHL_REDIRECT_URI=https://api.yourdomain.com/api/auth/callback6 Publish your app
Go to MANAGE > Versions. Click the three-dot menu on your draft version and select "Publish".
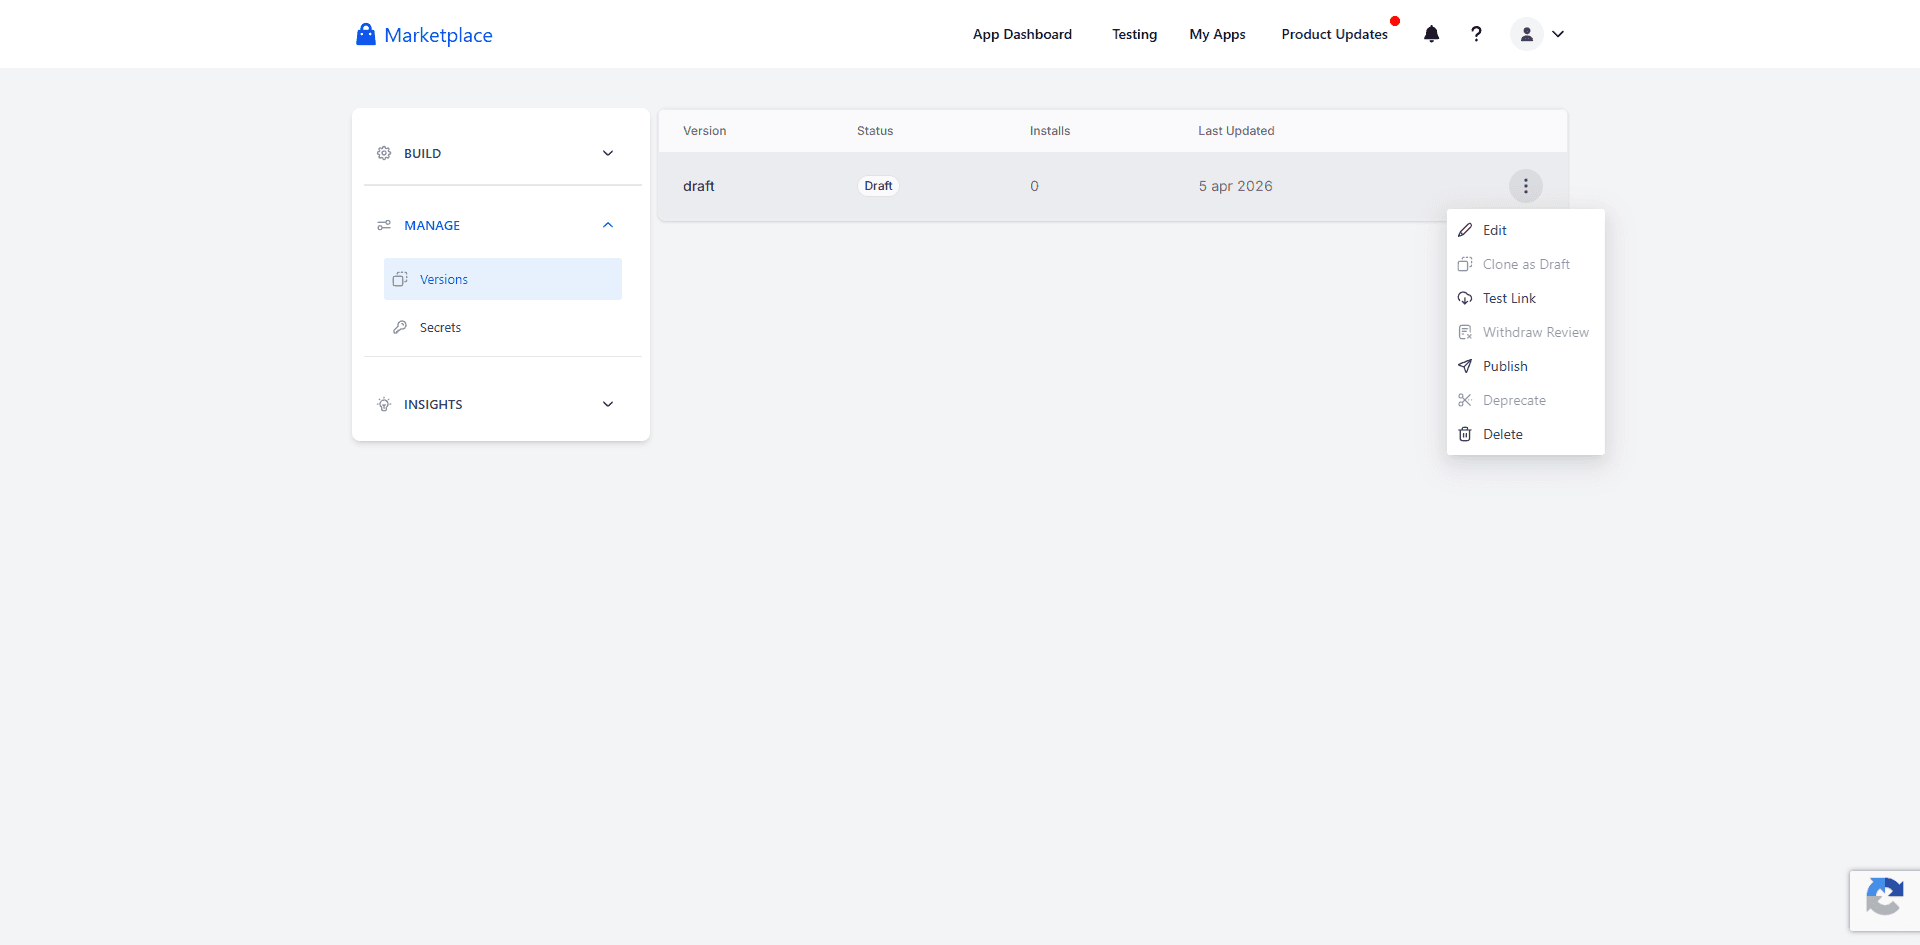
Click the three-dot menu, then 'Publish' A confirmation dialog shows what's required. Make sure all items have green checkmarks before proceeding.
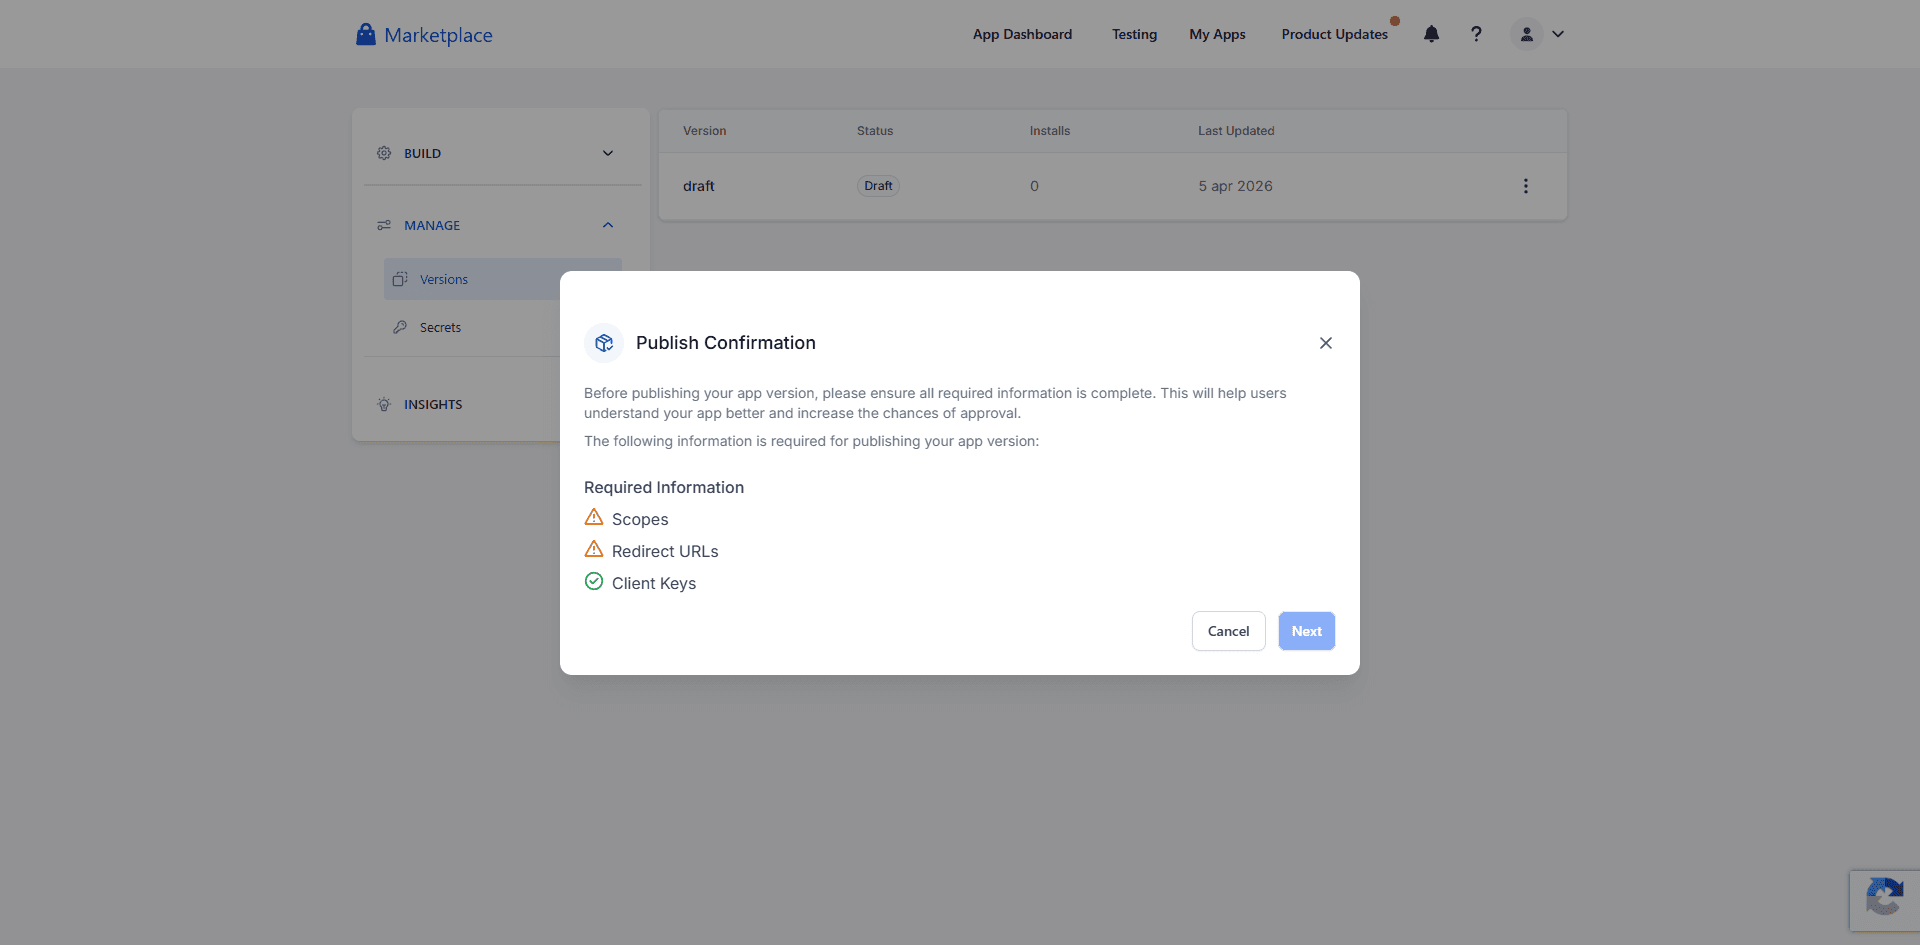
Note: This screenshot shows a test account. Your app should have all items completed (green checks) before publishing. 7 Install on your sub-account
Once published, go to your sub-account > Settings > Integrations > Marketplace. Find your private app, click "Install", select the location, and authorize the scopes.
Key Gotchas
| Gotcha | Solution |
|---|---|
| Token endpoint returns errors | Use application/x-www-form-urlencoded, NOT JSON |
| Refresh token stopped working | Refresh tokens are single-use. Store the new one after every refresh. |
| Auth code expired | Authorization codes expire in 10 minutes. Exchange immediately. |
| Need to add new scopes | Users must uninstall and reinstall the app. Plan scopes carefully. |
| API calls return empty/error | Missing the Version: 2021-07-28 header (required on every call) |
Start Building
Open Claude Code in your project and try these:
Claude reads the skill references, finds the exact endpoint, and gives you the right method, path, parameters, and working code — on the first try.
Troubleshooting
Claude doesn't use the skill▾
Additional domains not loading▾
"Version header missing" errors▾
Private Token expired▾
OAuth refresh token stopped working▾
Didn't receive GitHub invite▾
Need help?
Stuck on setup or have questions about the HL API?
Contact Support